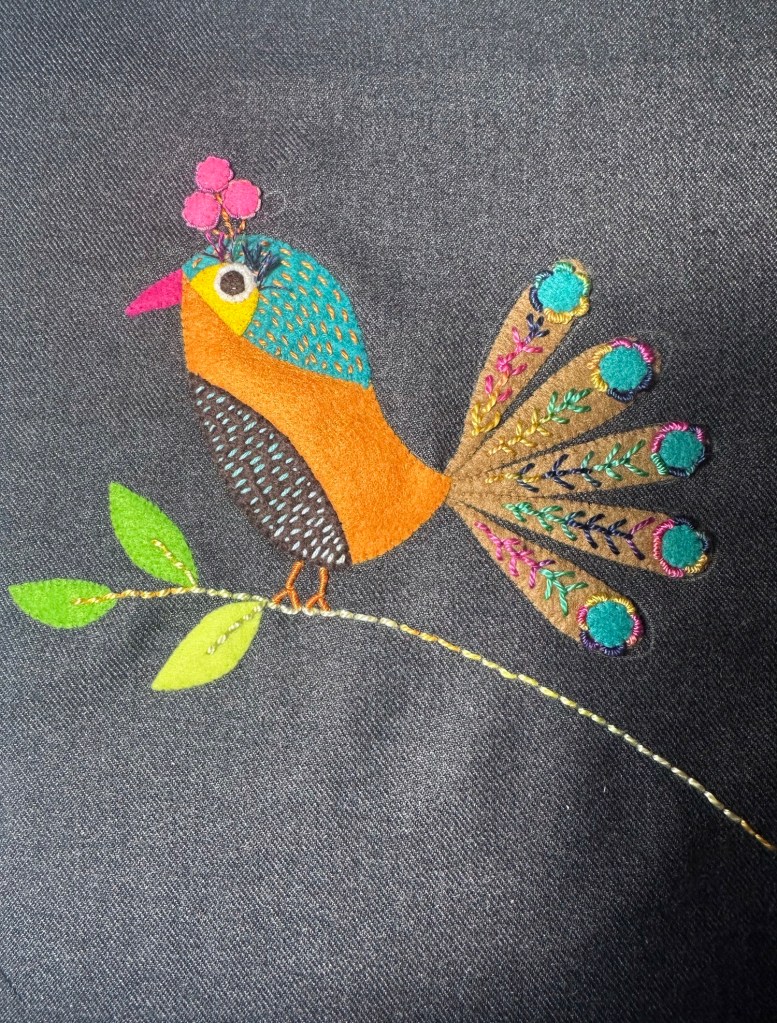
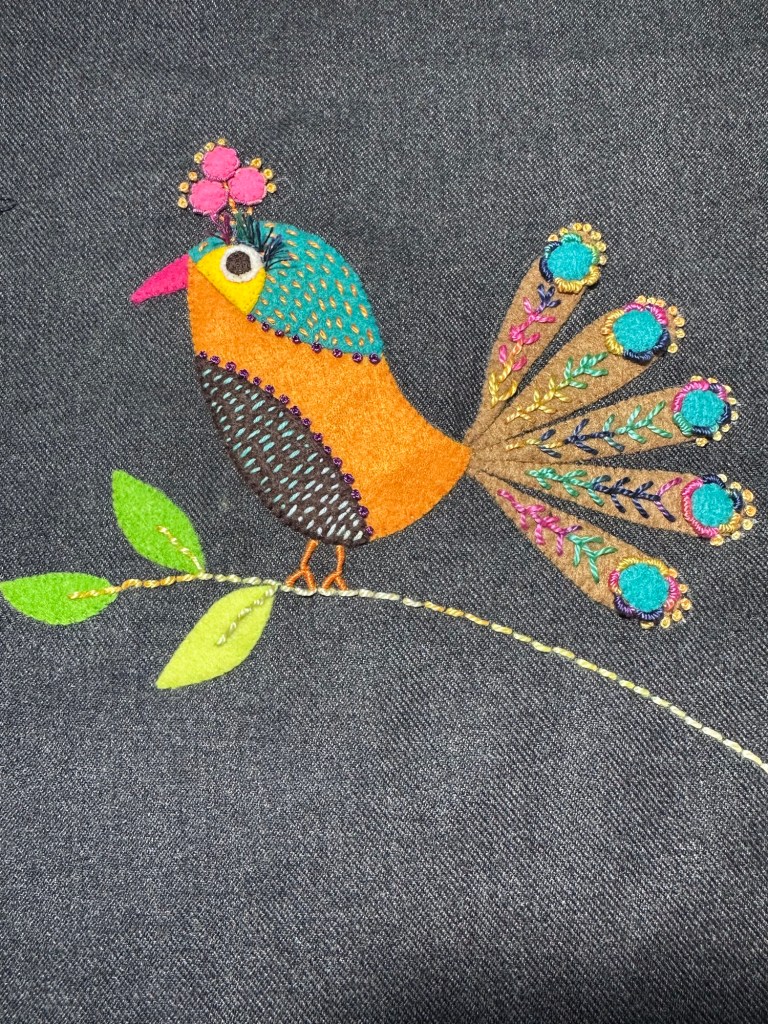
The Free-Spirited Birds and Bloom, appliqué pattern series of birds draws its inspiration from the vibrant Gond paintings of Madhya Pradesh, India, an art form celebrated for its intricate details and rich storytelling. Gond paintings are deeply rooted in nature and folklore, often depicting animals, trees, and other elements of the natural world with rhythmic lines, bold colors, and striking patterns.
This artistic style seamlessly matches the spirit of the birds envisioned in the series. The fluidity of Gond patterns allows each appliqué bird to radiate movement and life, while the bold color palette enhances their dynamic presence. The intricate, geometric patterns and dot work, signature elements of Gond art, add layers of depth, perfectly complementing the grace and vibrancy of birds.
In this series, every appliqué design reflects the harmony and storytelling essence that Gond paintings are known for. The birds become not just decorative elements but symbols of freedom, nature’s beauty, and the rhythmic connection between tradition and modern creativity.
This project is a heartfelt homage to the Gond tribe’s artistic legacy, weaving their timeless techniques into a contemporary appliqué medium while preserving their cultural essence.
Appliqué instructions
How to Appliqué Like a Pro (or at Least Pretend You Are)
Step 1: Gather Your Gear, Soldier!
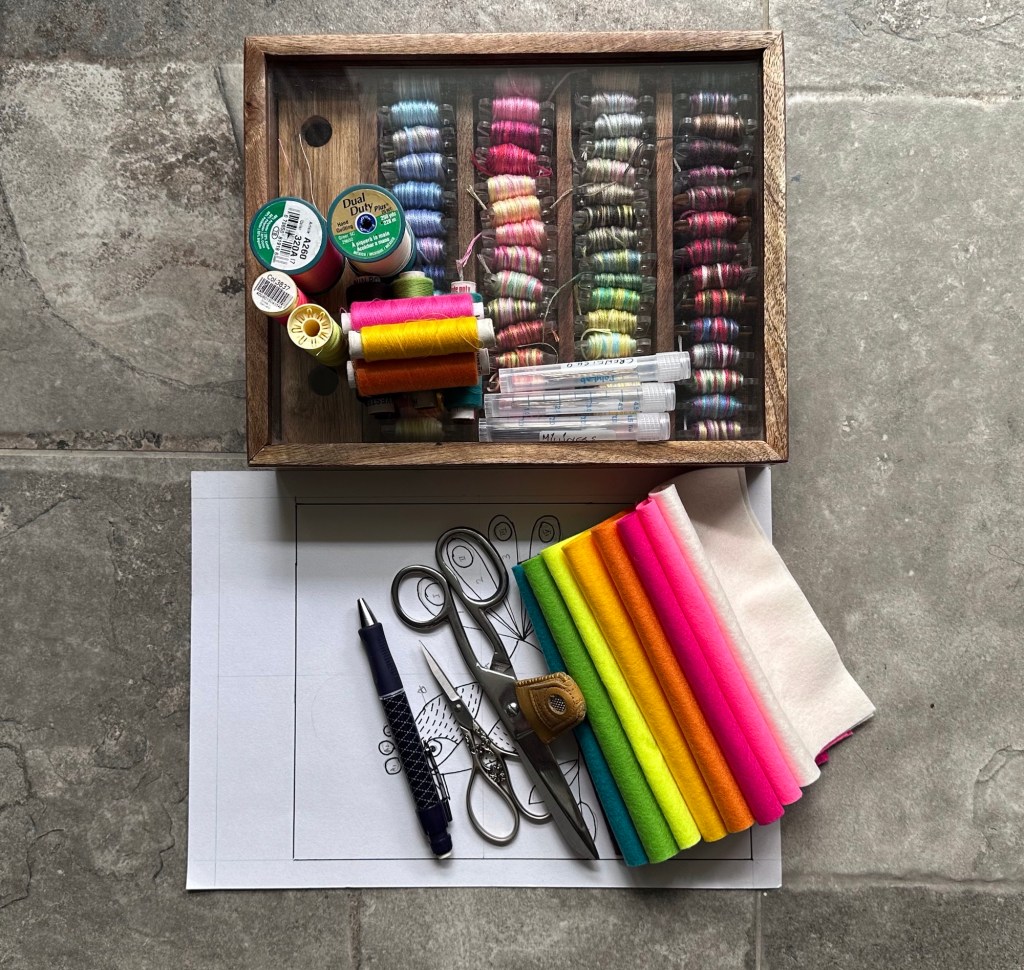
You’ll need:
-Felt or felted wool or acrylic wool blend: Fancy names, but I’m just using an acrylic wool blend because, well, life’s expensive.
-Dark grey or black woolen fabric: The perfect background to make your appliqué pop.
-Sharp scissors: Not your kitchen ones, please.
-Matching threads: Yes, match them, because a polished appliqué doesn’t need to clash.
-Hand sewing needles: Because stabbing yourself occasionally keeps you humble.
-Embroidery needles: For those moments when you feel like an artist also for those stitches that demand a little finesse
-Pearl cotton size 5, 8, & 12: The thickest (5) for bold flair, the finest (12) for delicate charm, and size 8 for everything in between.
-Embroidery floss: Your go-to for vibrant details.
-Freezer paper: It’s not just for your freezer anymore.
Step 1: Cut Your Background Fabric. Add an extra inch for the seam, because no one’s perfect (except maybe your grandma).
Step 2: Channel Your Inner Trace Detective.
Trace your appliqué pieces on freezer paper like a boss.
Crisp edges = less embarrassment when showing off.

Step 3: Pre-Fluff the Fluff
Do most of the embroidery before attaching your appliqué pieces. Why? Because we like fluffy appliqué, not sad, flat pancakes. Leave the edges for later; they deserve some fluff-enhancing drama.
Add the Peacock Drama with Decorative Stitches
Time to bring your appliqué to life with bold embroidery:
-Use running stitch on B and C to highlight and enhance.
-Add fly stitch to the tail pieces (1-5) to create delicate, feathery elegance.
-Surround I-IV with bullion knots on the background fabric for extra texture and richness.
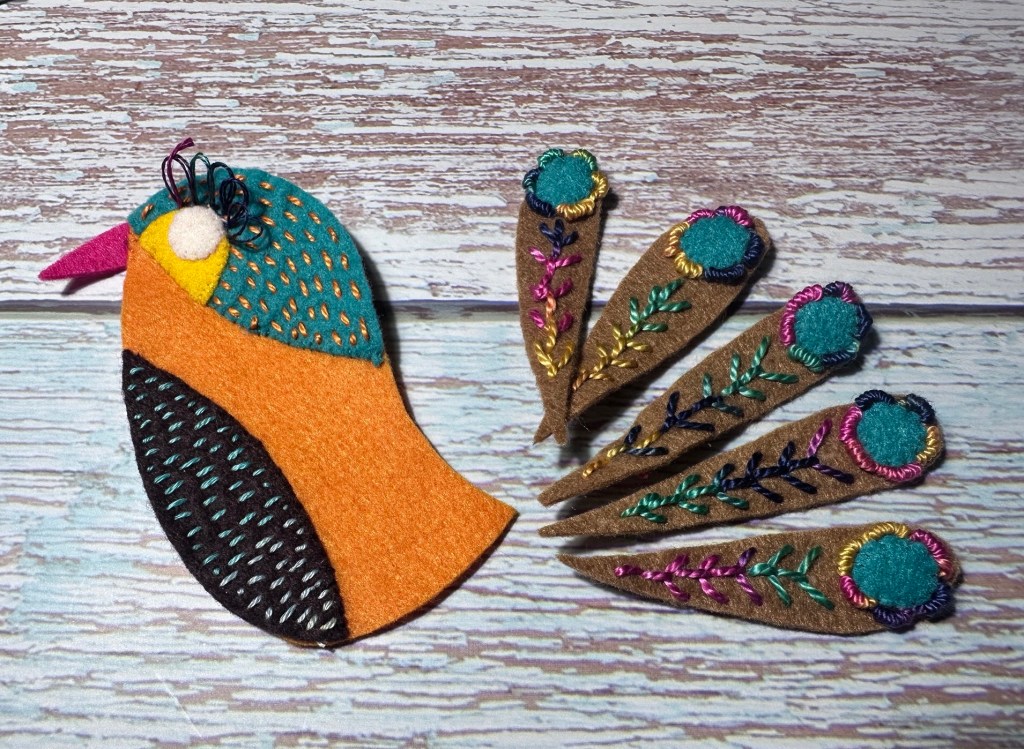
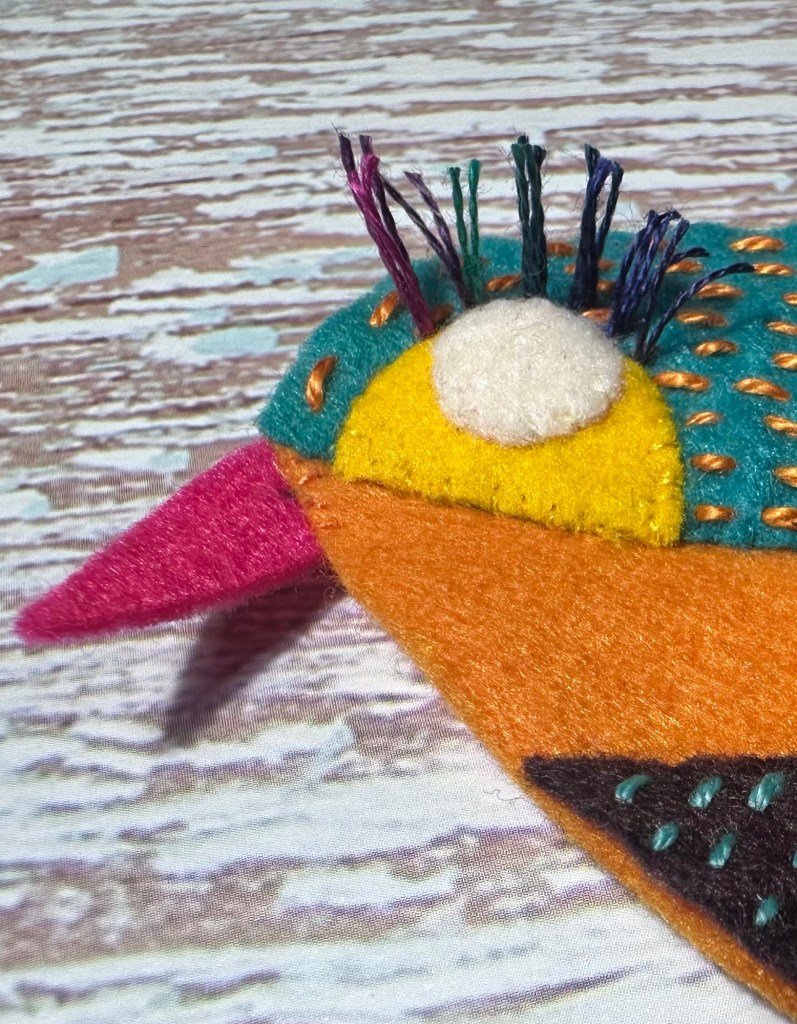
-Use turkey work around the eyes to create bold, dramatic eyelashes that would make even the fanciest peacock envious. Give it a trim.
Pro Tip: These stitches are the spice rack of your appliqué—use them wisely.
Step 4: Appliqué Madness
Now, follow this cryptic sewing map. Trust the process—it’s not as wild as it sounds:
-Sew E2 on E1 (E = Everything’s fine).
-Plop E1 on B.
-Toss B and C on A (think of A as the cool parent hosting a sleepover).
-Appliqué I on 1, because letters and numbers apparently need to mingle.
-Appliqué II on 2—see the pattern here?
-Appliqué III on 3, because rules are rules.
-Appliqué IV on 4 (you’re almost done, breathe).
-Finally, throw V on 5, because why not end with a victory?
Step 5: Stitch Your Way to Glory
Whip stitch the felt pieces together, then stitch to the background decorative touches with French knots wherever you feel like. It’s your peacock now.
Step 6: Admire, Nap, Repeat
Sit back and admire your work like a sewing genius. Take a well-deserved nap before starting your next masterpiece. Don’t worry about the fluff, it knows you care.

Leave a comment